- Sale
- 360 Degree Photography
- Battery and Battery Grip
- Backgrounds Even Color
- Backgrounds with Print
- Background Systems
- Cameras
- Camera Accessories
- Camouflage
- Continuous and Videolight
- Filters, Converters and Rings
- Photo frames
- Clamps and Adapters
- Cases and Bags
- Bulbs
- LED Lighting
- Magnifying Glasses
- Macro Photography
- Microphones
- Microscopes
- Night Vision Devices
- Shooting Tables and Tents
- Outdoor and Survival
- ID Photo Systems
- Flash Umbrellas
- Printers
- Reflectors
- Reflectors and Snoots
- Riflescopes
- Rigs Sliders and Stabilizers
- Camouflage Hides
- Smartphone Accessories
- Soft Boxes and Beauty Dishes
- Speedlite Camera flashes
- Spotting scopes
- Tripods and Ballheads
- Strobist
- Studio Accessories
- Studio Flashes and Kits
- Tecco Ilford Print Media
- Telescopes
- Trigger Sets
- Binoculars
- Thermal Imaging
Payment methodes:
|
||||||
Reviews:NewsletterPacked with tips, promotions and exclusive discounts! |
||||||
Follow Benel:
|
The step-by-step guide to water-drop photography
Water drop photography is the most popular form of high-speed photography. When people start with high-speed photography, most of them try droplet photography first, because compared to other types of high-speed photography, it is easy to photograph. Once you're done with your settings, you can take many different photos by changing small settings.
Equipment:
1. Camera and lens: Almost every DSLR camera should work, but you need a macro lens because water droplets are very small. A 100mm macro is the best option because you have a safe distance between the camera and water droplets.
2. Speedlights: you need at least two speedlights for this, but if you have more, it would give you more control over the exposure and give you beautiful photos.
3. Tripod: you need several tripods, one for the camera, one for the water drip system and another for the flash units.
4. A water droplet removal system: you have many options. You can use a water bottle and make a small hole in it. In this case, you have no control over the size of the drop and the time interval between two drops.
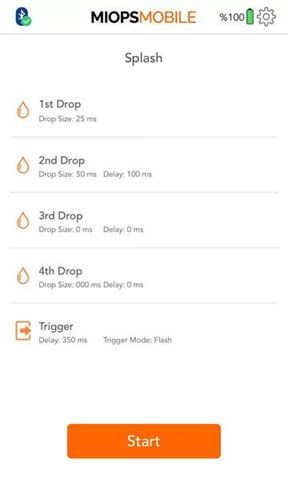
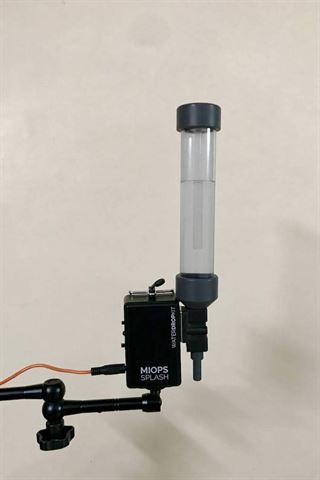
The second option is a water droplet photo set such as the MIOPS Splash Water Drop Kit. It is a stand-alone waterfall kit for the smartphone that not only controls the size and interval of the drops, but can also activate your camera or flash at the right time.
5. Tray: you also need a tray where the water drop will fall into and create a nice splash. The best option for a container is a black-glass or plexiglass tray. The dimensions should be about 40 by 30 cm and 5 cm deep. You can also use a wine glass or ceramic cup or bowls instead of a tray.
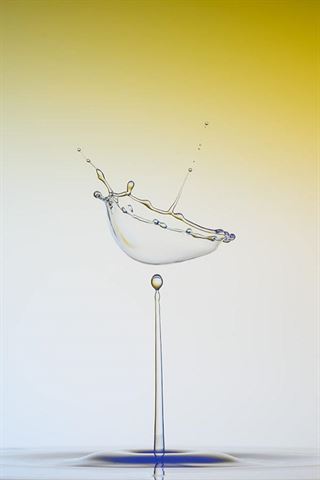
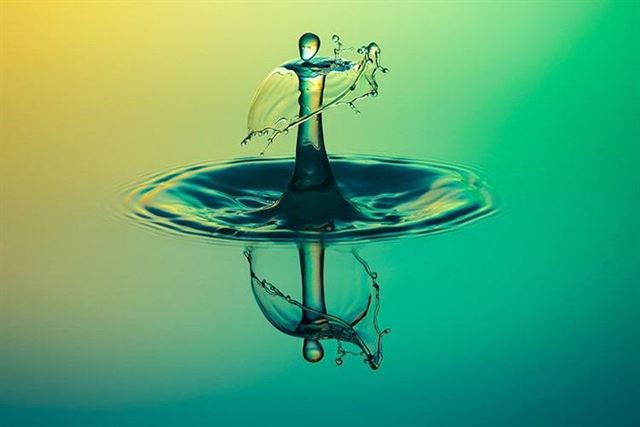
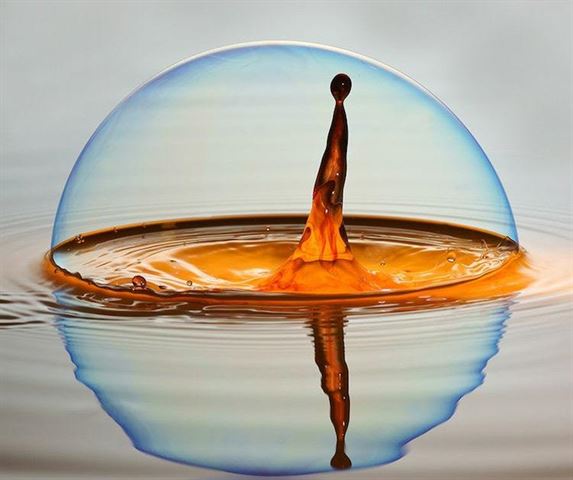
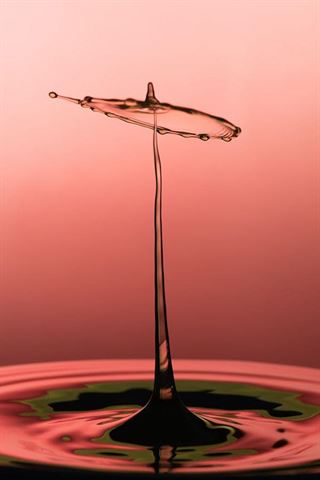
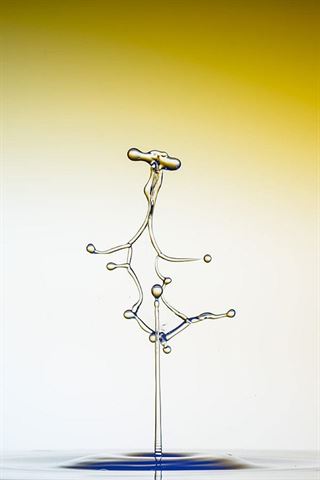
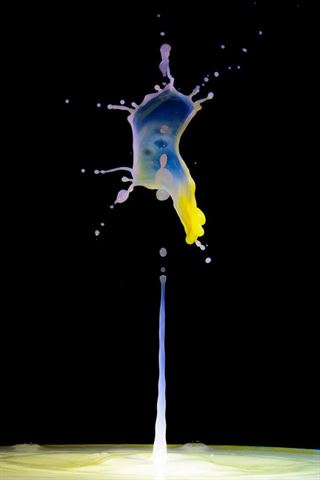
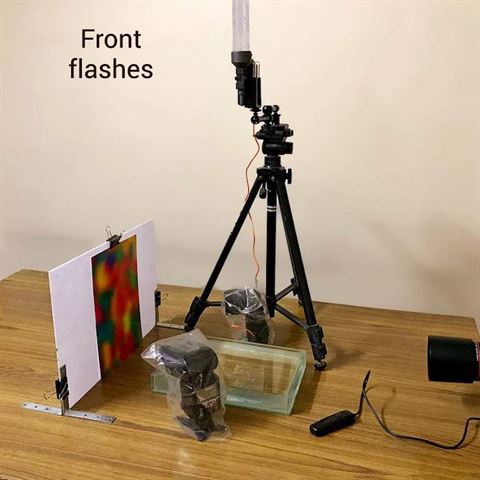
6. Backgrounds: for the background there are many options. You can find a colourful abstract image and print it on an A4 sheet. In this case, you will need to place the flash units on the front side. The second option is that you can use the same abstract image and print it on a transparent sheet and place the flash on the back. See the abstract photo examples below.

You can also use crumpled aluminum foil and place different color gels on flash units. Or flash directly with a colored gel filter on white paper. Just use your imagination and you'll come up with more ideas.
Other than this you need a white plexiglass picture to place backgrounds. A relaxation cable, some liquid soap, some clamps, L brackets and a quiet room.
Setting:
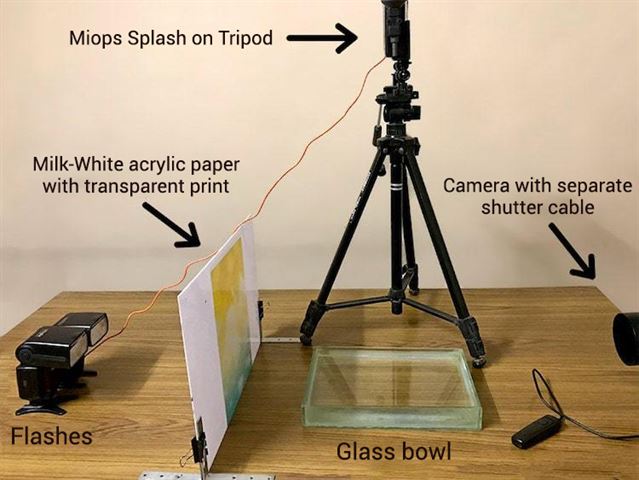
Now that we've gathered everything we need, it's time to make the setup. In the first place a white plexiglass plate as background with the help of clamps. Make sure it is at least 60 centimetres away from the wall, so that you can place flash units when backlighting. Now attach your print to the plexiglass with clamps or tape.
Now place two flash units on the back of the sheet. The distance between the flash units and the background should be about 50 cm. Now place your water tank about 15 centimetres from the background. If you are using the MIOPS Splash kit, mount it on a tripod and place it where the drop of water falls in the middle of the tray. Now place your camera on a tripod and manually focus the camera where the drop will fall. When everything is ready, your setting should look like the following pictures.
Camera settings:
Set the camera to bulb mode, ISO to 100 and aperture f/16 (so we have the whole splash in focus). Now turn on both flash units and set the power to 1/64. If you are using MIOPS Splash, here are the settings:
First drop size: 25 milliseconds
Second drop size: 50 milliseconds and delay: 100 milliseconds:
Trigger delay: 350 milliseconds
Mode: Flash